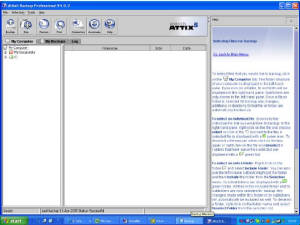
The left panel
has 3 displays available (individual detail is shown in the centre panel): -
- My Computer
- shows a summary of your file structure (The exact presentation will depend on your Operating System) and this is the area
where you will select folders, sub-folders and files for backup.
- My Backups –
this will display your last backup and previous backups and is what you would use to retrieve and restore folders, sub-folders
or files.
- Log –
This will show the log for each backup that is available online
There are a number of different ways that you can select
data for backup and the following is only a ‘Getting started’ suggestion, which will also give you an idea of
some of the options available. The Help text goes into much more depth and you
should look at this when you have time.
First of all, some important
tips which may help you: -
- Backup size – This free evaluation account is has a limit of 500MB. If you try to backup more than 500MB of data the storage server will reject the transfer. To avoid this, click on the “Size” button on the toolbar before you carry out the initial upload. This will show the number and total size of files included in the backup set. It will also individually list the files included in the criteria you have set. You can sort this list in size order by clicking on the column heading ‘size’
and individually remove files by right clicking and selecting ‘Exclude’. If you want to evaluate the service with
more than 500MB, please contact us.
- Deselection – If you get flustered over what you have selected and want to restart. First of all make sure that you are in the ‘My Computer’ display. Then within the file structure display, right click on ‘My Computer’ and left click on ‘Deselect’
folder. All previous selections and filters will be removed.
- The easiest way to build up your backup set is to start small and then expand your selection.
So –
first of all make sure that you are in the My Computer display (not ‘My Backups’ or ‘Log’).
My
Documents
Most people
will save Microsoft Office application data to a folder or sub-folder under ‘My Documents’. Therefore, one way to get started is to choose to backup all data in ‘My Documents’. To do this, Right click on ‘My Documents’
and Left click on ‘Include Folder’ (Selected folders/files are shown
green).
If you then
click on the ‘+’ sign and expand ‘My Documents’, all the sub-folders
will be shown in green. If you click on a sub-folder the
middle panel will list all the files in green (You can sort these by clicking on the column headings of filename, size and
date).
If you now
want to exclude a particular folder or sub-folder, Right
click on it and select ‘Exclude
Folder’.
If you want
to exclude specific files, right click on the file and select ‘Exclude’ (Excluded folders and files are shown red).
Outlook
Users of Outlook will want to backup their Outlook data. The location of MS Office Outlook (*.pst) and Outlook Express (folders *.dbx and address
book *.wab) files will depend on your operating system. For XP users, MS Office
Outlook data (.pst files) can be found in the following path C:/documents and Settings/’User name’/Local Settings/Application
data/Microsoft/Outlook/
The easy way to include both Outlook and Outlook Express
files is to set the 'MS Outlook' filter at a high level. This can also be used
to identify the folder location of the relevant files.
To set the filter: -
· Open
Attix5 Backup Professional
- Click on the ‘My Computer’ tab, if you are not already there (My Computer, My Backups,
Log).
- Right mouse click on C: in the left-hand panel.
- Highlight ‘Filters’ and a dropdown box will appear.
- ‘Check’ the box for ‘MS Outlook Mail’.
(You will see
that all the folders and sub folders below C: will change to light blue, which means a filter has been applied)
If you now
click on the ‘Size’ button you will discover that your Outlook files are included.
If you sort by size, they will usually be amongst the largest. If you
then position the cursor over the file name, it will reveal the file location.
To backup Outlook
it must be first closed during the backup process. This happens automatically
during the backup process (Outlook will not be closed if unsaved emails are open and a delay has been implemented to allow
the user to save any open emails and close Outlook). To re-open Outlook automatically,
you should go to ‘Tools’ on the menu and then Plugins/Outlook and check the box ‘Restart Outlook after backup’.
Calculating
Backup selection size
At any time
in the selection process you can see the files you have selected by clicking the ‘Size’ button. A new window will open and list all selected files showing a file count and total
size (MB). You can sort this list by the column headings of Filename, Size and
Date. Right click on any files to exclude them from your backup set.
Initial backup
You may want
to run a manual or automated backup now and return later to identify additional data.
A Manual backup can be instigated at any time by clicking on the ‘Backup’ button (Top left-hand corner). Alternatively, an automated backup will run at the scheduled time. Remember that the 1st backup of data will take some time (allow approx. 45 minutes per 100 MB)
and is best carried out when the PC is not going to be used. It is recommended
that you perform the initial backup overnight.
Before you
run your 1st backup, check by using ‘Size’, that your selection has not exceeded 500MB.
Data from other programs
You may well
have data from other programs, which might reside within a sub-folder of that program.
To backup this data you need to identify the folder and/or files and select ‘Include folder’.
Using filters
Filters can
be used very effectively to include certain types of file. By right clicking
on a folder or sub-folder and highlighting Filters you can select an existing filter from the drop down box (See the
Help Index for creating New filters or for Editing existing ones.
Deselecting folders
At any time
you can deselect folders and sub-folders by right clicking on the Folder or sub-folder and selecting ‘Deselect folder’.
Icon Legend
If you click
on the text heading Help and select Icon Legend, there is a drop down listing of the significance of colours used.